


The following is a transcript of the video:
Growing from seed indoors is useful because it gives your plants a head start even if the weather outside isn’t warm, resulting in earlier and longer harvests than would otherwise be possible.
It’s particularly good for tender crops such as tomatoes, peppers and squash
For best results, follow these top tips:
Use a good seed-starting soil. It needs to be fine and moisture- retentive so that the young seedlings don’t dry out.
Seeds are usually planted at a depth of 1-2 times the size of their longest edge and they need the soil above them to be gently firmed down.
Then, water them with a fine-rosed watering can or spray. The soil needs to be fully moistened but not waterlogged so that they also have air and don’t rot.
Seeds need warmth to germinate, so use a maximum-minimum thermometer to find somewhere in your house at the temperature indicated on the seed packet.
However, warm soil does tend to dry out quickly, so to prevent this you can either cover them with a plastic bag or regularly check and water them.
The seed packet will usually tell you how many days it takes for them to germinate, but you need to check daily because as soon as they emerge you’ll need to transfer them to somewhere with good strong natural light. A very common mistake is to place the seeds on a windowsill which often doesn’t give the same strength of light as growing outdoors.
This produces leggy seedlings and once they’ve started off badly, they will find it hard to recover.
Most houses are already warm enough for seeds to grow, so if you’re going to buy a propagator it’s better to choose full-spectrum grow lights to supplement light, not heat, especially during late winter and early spring.
There’s no point starting seeds too early, only to find that they’ve outgrown their pots before the weather has warmed up enough outside.
And starting seeds too late can mean they don’t have time to properly develop.
That’s where our Garden Planner can help. It looks up your nearest weather station and uses climate data for your specific location to calculate the best range of planting dates for each crop.
On the Plant List, the blue bars indicate the range of dates that you can start the seeds indoors, and the green bars indicate when they can be transplanted outside or sown directly into the soil.
For example, for my location the Garden Planner shows that I need to start onions from seed very early in spring, then tomatoes a few weeks later.
Squash mustn’t be sown indoors until much later, because they grow very quickly and it won’t be warm enough outside to transplant them if I start them at the same time as tomatoes.
Root crops such as carrots and parsnips should always be sown directly into the soil they will grow in, so that’s why they don’t have blue bars for sowing indoors. Sometimes sowing indoors is optional – for example, with peas and beans, indoor sowings are mainly used if you want to get an early crop, but later sowings are usually direct into the soil, so the Garden Planner shows longer green bars for when you can sow them directly.
Experienced gardeners always hedge their bets. Successful gardening depends on so many factors.
Is the season unusually warm or cold this year? Are your first seedlings going to be eaten by pests like slugs or birds? That’s why it’s a good idea to sow seeds in small batches a few weeks apart.
Our Garden Planner calculates how many plants you can fit into the area you have so that you know just how many are required, though it’s always wise to raise a few extras as backups.
For example, if i need 5 tomato plants I will usually sow 10 seeds over a few weeks and will then pick the strongest-looking seedlings to actually plant in the garden. After a few weeks, the seedlings will have developed their second set of leaves, called their ‘true’ leaves because these are the ones that look like the final plant.
At this stage, and before their roots get entangled, it’s good to transfer the best ones into their own pots. To do this, first prepare the new pot, making a suitable-sized hole. Then use something like a teaspoon to gently ease out the young plant’s roots.
Always pick up the seedling by one of the leaves, not by the stem, because squeezing the stem at this early stage can damage the fine capillary tubes which carry water. Microscopic hairs on the roots are how the seedling draws up water and nutrients, so aim for the minimum of disturbance, taking as much soil as possible with the seedling.
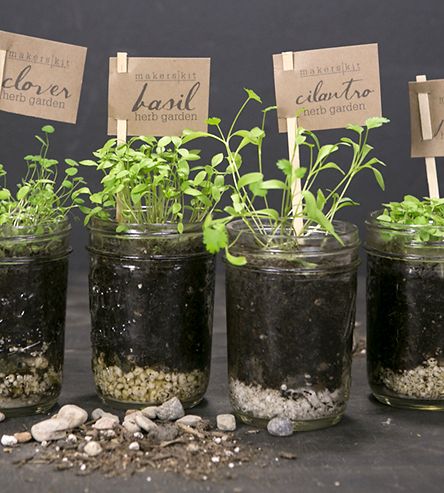
Then gently firm around it in the new pot to remove air pockets. It may seem obvious, but many gardeners forget to label each pot and then have trouble identifying it when planting outside.
Note down the variety you are growing, and dates such as when the seed was sown and transplanted so that you can learn which ones performed best. In our Garden Planner you can keep notes on the Plant List, which will help you with planning next year.
Seedlings grown indoors are vulnerable to a lack of moisture, nutrients or warmth. Just like an intensive care unit, you need to make sure that you supply everything they need, so check on them at least once a day.
Push your thumb into the soil or pick up the pot to feel how much water contains. Check that they have enough light and warmth. Going from intensive care straight into cold outdoor conditions is a shock few seedlings can survive.
As the plants get larger, gradually introduce them to outside conditions – a process known as ‘hardening off’.
Take them outside for just 1 hour a day at first, then increase this each day over a period of a week or more until they are finally ready to be planted. A greenhouse or cold frame is an excellent halfway house if the soil isn’t quite ready for them. By following these tips, you’ll give your seedlings the very best chance of survival and set yourself up for a great harvest.
Disclosure of Material Connection: Some of the links in the post above are “affiliate links.” This means if you click on the link and purchase the item, I will receive an affiliate commission. Regardless, I only recommend products or services I use personally and believe will add value to my readers. I am disclosing this in accordance with the Federal Trade Commission’s 16 CFR, Part 255: “Guides Concerning the Use of Endorsements and Testimonials in Advertising.”
No Comment